Who loves creating apps.

Category: Uncategorized (Page 1 of 5)

Introducing Vision Week

Your Gateway to a Virtual Exploration!

Are you ready to dive into an innovative virtual exploration experience? Meet Vision Week, an app designed to offer a comprehensive and interactive platform for users to engage with various forms of content including news, user data, zoo information, and more. This application not only enhances your digital experience but also brings a wealth of information right at your fingertips, making it useful for your daily life.

Features and Functionality

Vision Week is built to cater to a wide range of needs with features such as:

  1. Latest News Updates:
    Stay informed with the most recent articles and news updates. Our app fetches and displays the latest news, ensuring you never miss out on important events.
  2. User Data Management:
    Manage and view user data efficiently. The app allows users to register, log in, and access their profiles seamlessly.
  3. Zoo Information:
    Explore detailed information about various animals and their habitats. This feature is perfect for animal lovers and those curious about wildlife.
  4. Access Logs:
    Keep track of data access logs, providing transparency and security for user interactions with the app.
  5. Design Thinking Quiz:
    Engage in interactive quizzes that challenge your creativity and problem-solving skills.

Technical Overview

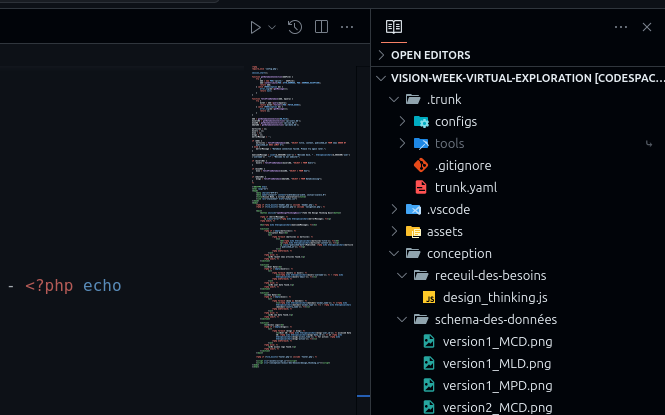
Our app is developed using PHP and SQLite, ensuring a lightweight yet powerful backend. Here’s a glimpse of the code that powers Vision Week:

<?php
require_once 'config.php';

session_start();

function getDatabaseConnection($dbFile) {
    try {
        $db = new PDO('sqlite:' . $dbFile);
        $db->setAttribute(PDO::ATTR_ERRMODE, PDO::ERRMODE_EXCEPTION);
        return $db;
    } catch (PDOException $e) {
        error_log($e->getMessage());
        return null;
    }
}

function fetchFromDatabase($db, $query) {
    try {
        $stmt = $db->query($query);
        return $stmt->fetchAll(PDO::FETCH_ASSOC);
    } catch (PDOException $e) {
        error_log($e->getMessage());
        return [];
    }
}

$db = getDatabaseConnection(DB_FILE);
$usersDb = getDatabaseConnection('sql/users.db');
$zooDb = getDatabaseConnection('sql/zoo.db');
$dataDb = getDatabaseConnection('sql/data.db');

$articles = fetchFromDatabase($db, "SELECT title, content, published_at FROM news ORDER BY published_at DESC LIMIT 3");
$users = fetchFromDatabase($usersDb, "SELECT * FROM Users");
$zoo = fetchFromDatabase($zooDb, "SELECT * FROM Zoo");
$logs = fetchFromDatabase($dataDb, "SELECT * FROM DataAccessLog");

$welcomeMessage = isset($_SESSION['user']) ? "Welcome back, " . htmlspecialchars($_SESSION['user']['username']) . "!" : "Welcome to our website!";
?>
<!DOCTYPE html>
<html lang="en">
<head>
    <meta charset="UTF-8">
    <meta name="viewport" content="width=device-width, initial-scale=1.0">
    <title>Vision Week, a virtual exploration!</title>
    <link rel="stylesheet" href="styles.css">
</head>
<body>
    <?php if (file_exists('header.php')) include 'header.php'; ?>
    <?php if (file_exists('navigation.php')) include 'navigation.php'; ?>

    <main>
        <button onclick="openDesignThinkingQuiz()">Take the Design Thinking Quiz</button>

        <h1><?php echo htmlspecialchars($welcomeMessage); ?></h1>

        <section>
            <?php if (!empty($articles)): ?>
                <h2>Latest News</h2>
                <ul>
                    <?php foreach ($articles as $article): ?>
                        <li>
                            <h3><?php echo htmlspecialchars($article['title']); ?></h3>
                            <p><?php echo htmlspecialchars($article['content']); ?></p>
                            <p class="published-date">Published: <?php echo htmlspecialchars($article['published_at']); ?></p>
                        </li>
                    <?php endforeach; ?>
                </ul>
            <?php else: ?>
                <p>No recent news articles found.</p>
            <?php endif; ?>
        </section>

        <section>
            <h2>User Data</h2>
            <?php if (!empty($users)): ?>
                <ul>
                    <?php foreach ($users as $user): ?>
                        <li><?php echo htmlspecialchars($user['username']); ?> - <?php echo htmlspecialchars($user['email']); ?></li>
                    <?php endforeach; ?>
                </ul>
            <?php else: ?>
                <p>No user data found.</p>
            <?php endif; ?>
        </section>

        <section>
            <h2>Zoo Data</h2>
            <?php if (!empty($zoo)): ?>
                <ul>
                    <?php foreach ($zoo as $animal): ?>
                        <li><?php echo htmlspecialchars($animal['animal_name']); ?> (<?php echo htmlspecialchars($animal['animal_type']); ?>) - <?php echo htmlspecialchars($animal['country_name']); ?></li>
                    <?php endforeach; ?>
                </ul>
            <?php else: ?>
                <p>No zoo data found.</p>
            <?php endif; ?>
        </section>

        <section>
            <h2>Access Logs</h2>
            <?php if (!empty($logs)): ?>
                <ul>
                    <?php foreach ($logs as $log): ?>
                        <li>User ID: <?php echo htmlspecialchars($log['user_id']); ?> accessed Data ID: <?php echo htmlspecialchars($log['data_id']); ?> at <?php echo htmlspecialchars($log['access_time']); ?> for action: <?php echo htmlspecialchars($log['action']); ?></li>
                    <?php endforeach; ?>
                </ul>
            <?php else: ?>
                <p>No access logs found.</p>
            <?php endif; ?>
        </section>
    </main>

    <?php if (file_exists('footer.php')) include 'footer.php'; ?>

    <script src="/assets/script.js"></script>
    <script src="/conception/receuil-des-besoins/design_thinking.js"></script>
</body>
</html>

User Interface and Daily Usefulness

Vision Week is designed with a user-friendly interface that ensures ease of use and accessibility. The layout is clean and intuitive, making navigation a breeze. Here are a few ideas for the UI and how the app can be useful in daily life:

  1. Dashboard:
    A central hub displaying personalized news feeds, user activity, and quick access to different sections of the app. This makes it easier to stay updated and manage your activities efficiently.
  2. User Profile:
    A dedicated section for managing user profiles, viewing personal data, and updating information. This promotes user engagement and personalizes the experience.
  3. Interactive Zoo Map:
    An engaging and educational feature where users can explore animals through an interactive map, learn about different species, and their habitats. This can be a fun activity for both kids and adults.
  4. Notifications and Alerts:
    Real-time notifications to alert users about important news updates, upcoming quizzes, and more. This keeps users engaged and informed.

Useful Links

Screenshots and Visuals

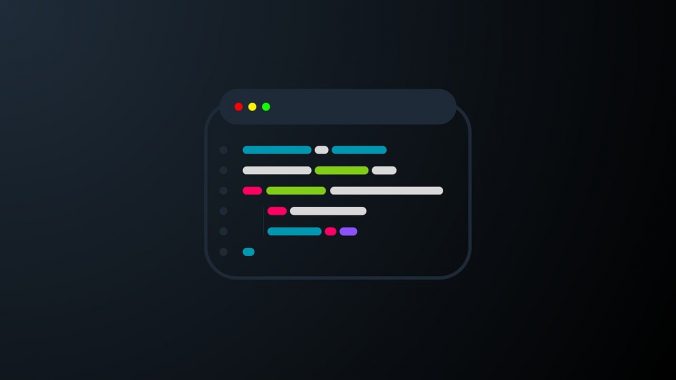
Here’s a sneak peek at our user interface design:

Dashboard
Caption: The Vision Week Dashboard provides an overview of your activities.

man wearing grey shirt beside green wall
Caption: Manage your profile and view your personal data with ease.


Caption: Explore the zoo interactively and learn about different animals.

Conclusion

Vision Week is not just an app; it’s a comprehensive platform designed to enhance your daily life with its rich features and intuitive design. Stay informed, manage your data, and explore the world around you with Vision Week. We are committed to providing you with the best virtual experience possible.

Stay tuned for more updates and features. Happy exploring!


In conclusion, Vision Week has been an inspiring journey, not only for setting personal goals but also for fostering collaboration and community engagement. As I pursue my side project, TurboZoo, I invite you to join me in this exciting venture.

Whether you’re interested in contributing to the code, sharing ideas, or simply having fun, there’s a place for you. 😁

Check out the project on GitHub or Replit, and don’t miss the video of the first version here.

Our Discord community !

Full Stack TikTok Clone with Nuxt 3, Vue 3, Tailwind CSS, Laravel API, Pinia, Axios, Javascript

This tutorial likely covers the end-to-end development process, from setting up the frontend with Nuxt 3 and Vue 3, styled using Tailwind CSS, to creating a backend API with Laravel. It also seems to delve into state management using Pinia and data fetching with Axios, all tied together with JavaScript

.This tutorial is perfect for developers interested in building complex web applications using some of the latest technologies in the web development space. Nuxt 3 offers a powerful and flexible framework for Vue.js applications, enabling server-side rendering, static site generation, and single-page application functionality.

Vue 3 brings an improved composition API, performance enhancements, and more. Tailwind CSS provides utility-first CSS that helps in rapidly building custom designs without leaving your HTML.

Laravel, a PHP framework, is known for its elegant syntax and provides robust features for building web APIs. Pinia serves as the officially recommended state management library for Vue.js, and Axios is a popular JavaScript library used to make HTTP requests.For those looking to expand their full-stack development skills with a focus on modern JavaScript frameworks and libraries, this video tutorial could be a valuable resource.

Whether you’re building a project for learning, portfolio development, or even a prototype for a startup idea, the skills and technologies covered in this tutorial are highly relevant and sought after in today’s web development industry.

Click here to display content from YouTube.
Learn more in YouTube’s privacy policy.

Mobile App with React using Visual Studio Code and Linux

Installation: npm installs packages to your project or globally on your machine. npx executes packages from the npm registry without requiring a permanent installation.

Flexibility: npx provides a more flexible way to use and test npm packages and tools without altering your project’s setup or your global environm

Setting Up the Development Environment

  1. Install Node.js and npm: React requires Node.js to run on your machine. You can install Node.js and npm together from the Linux terminal. sudo apt update sudo apt install nodejs npm
  2. Install Visual Studio Code: VS Code is a popular code editor for React development. Install it from the official package or the Ubuntu Software Center. sudo snap install --classic code
  3. Open VS Code and install essential extensions like ESLint, Prettier, and the Reactjs code snippets for a better development experience.

Initializing the React Project

  1. Open a terminal and run the following command to create a new React app named my-app: npx create-react-app my-app
  2. Navigate into your project directory: cd my-app
  3. Start the development server to see your app in action: npm start

Implementing Context API

The Context API allows you to share state across the entire app easily, which is especially useful for themes, user information, etc., without prop drilling.

Create a Context: In your src directory, create a new file named ThemeContext.js.

import React from 'react';

const ThemeContext = React.createContext();

export default ThemeContext;

Provide Context Value: To use the Context, you must wrap your component tree with the Context Provider and pass a value to it. Modify App.js to include the ThemeContext.Provider.

import React from 'react';
import './App.css';
import ThemeContext from './ThemeContext';

function App() {
  return (
    <ThemeContext.Provider value={{ theme: 'dark' }}>
      {/* Rest of your app components go here */}
    </ThemeContext.Provider>
  );
}

export default App;

Consume Context: Any child component in the component tree can now consume the Context value.

import React, { useContext } from 'react';
import ThemeContext from './ThemeContext';

function ThemeToggler() {
  const { theme, setTheme } = useContext(ThemeContext);

  return (
    <button onClick={() => setTheme(theme === 'dark' ? 'light' : 'dark')}>
      Toggle Theme
    </button>
  );
}

export default ThemeToggler;

Building a Mobile App with React Native and Expo

Developing a mobile application with React Native provides a seamless way to create cross-platform apps using JavaScript. This section of the article will guide you through the process of using Expo, a framework and platform for universal React applications, which simplifies the development and testing of React Native apps.

Step 1: Setting Up Your Development Environment

Before diving into coding, ensure your environment is prepared for React Native development with Expo.

  • Install Node.js: Ensure Node.js is installed on your system. It’s required for running the Expo CLI (Command Line Interface).
  • Install Expo CLI: Run npm install -g expo-cli in your terminal to install the Expo CLI globally.
  • Expo Go App: For real-device testing, download the Expo Go app from your device’s app store.

Step 2: Creating Your React Native Project with Expo

  1. Initialize the Project: In your terminal, navigate to your workspace and run expo init MyReactNativeApp to create a new React Native project. Choose a template from the options provided.
  2. Start the Development Server: Navigate into your project folder using cd MyReactNativeApp and start the project by running expo start. This command will open a new tab in your default web browser, displaying the Expo developer tools.

Step 3: Building Components and Implementing Navigation

With the project set up, you’ll begin developing your application’s UI and logic.

  • Creating Components: Organize your application by creating separate components for each part of your UI. Use functional components and React Hooks for state management and lifecycle methods.
  import React from 'react';
  import { Text, View } from 'react-native';

  const CustomComponent = () => (
    <View>
      <Text>Hello, React Native!</Text>
    </View>
  );

  export default CustomComponent;
  • Implementing Navigation: Install React Navigation in your Expo project to enable navigation between different screens.
  npm install @react-navigation/native @react-navigation/stack
  expo install react-native-screens react-native-safe-area-context

Set up a Stack Navigator as the root navigator for your app. This allows you to define a series of screens that users can navigate through.

  import { NavigationContainer } from '@react-navigation/native';
  import { createStackNavigator } from '@react-navigation/stack';
  import HomeScreen from './HomeScreen';
  import DetailsScreen from './DetailsScreen';

  const Stack = createStackNavigator();

  function AppNavigator() {
    return (
      <NavigationContainer>
        <Stack.Navigator initialRouteName="Home">
          <Stack.Screen name="Home" component={HomeScreen} />
          <Stack.Screen name="Details" component={DetailsScreen} />
        </Stack.Navigator>
      </NavigationContainer>
    );
  }

Step 4: Testing and Debugging

  • Testing on Devices: Use the Expo Go app to scan the QR code displayed in your terminal or Expo developer tools. This allows you to test the app on real devices.
  • Debugging: Take advantage of the debugging tools provided by Expo and React Native. Use console.log, React Developer Tools, and the remote debugger to trace and fix issues.

Conclusion

This article has guided you through setting up your development environment, creating a new React Native project with Expo, building components, and implementing navigation.

Advanced Techniques and Strategies for Hosting on Fly.io

Begin with an overview of Fly.io, emphasizing its role in cloud computing and its appeal for hosting applications at no cost. Mention its global network of servers and the benefits of edge hosting.

# Pseudocode for scaling based on traffic
if traffic_increase > 20%:
    flyctl scale count +2
elif traffic_decrease > 20%:
    flyctl scale count -1

Wrap up the article by reiterating the benefits of using Fly.io for hosting applications, focusing on its cost-effectiveness, scalability, and performance optimization features.

Links and Resources

GitHub Actions for Continuous Deployment to Fly.io

name: Deploy to Fly.io
on:
  push:
    branches:
      - main
jobs:
  deploy:
    runs-on: ubuntu-latest
    steps:
    - uses: actions/checkout@v2
    - name: Deploy to Fly.io
      uses: superfly/flyctl-actions@1.1
      with:
        args: "deploy"
      env:
        FLY_API_TOKEN: ${{ secrets.FLY_API_TOKEN }}

This YAML script integrates GitHub Actions with Fly.io, enabling automatic deployment whenever changes are pushed to the main branch. This setup is particularly useful for maintaining continuous delivery pipelines and ensuring that applications hosted on Fly.io are always up-to-date with the latest code changes.

By incorporating advanced deployment strategies, scalability solutions, and security practices, you can fully leverage Fly.io’s capabilities to host and manage your applications efficiently.

connects to a MySQL database using PHP.

Step 1: Database Setup

First, we’ll set up a MySQL database named my_app and a table named users to store user information.

SQL to create database and table:

CREATE DATABASE my_app;

USE my_app;

CREATE TABLE users (
id INT(11) AUTO_INCREMENT PRIMARY KEY,
name VARCHAR(50),
email VARCHAR(50),
age INT(11)
);

Step 2: PHP Code to Connect to the Database

Create a file named db.php to handle the database connection.

<?php
$host = ‘localhost’;
$dbname = ‘my_app’;
$username = ‘root’; // default username for localhost
$password = ”; // default password for localhost

try {
$pdo = new PDO(“mysql:host=$host;dbname=$dbname”, $username, $password);
// Set the PDO error mode to exception
$pdo->setAttribute(PDO::ATTR_ERRMODE, PDO::ERRMODE_EXCEPTION);
echo “Connected successfully”;
} catch(PDOException $e) {
echo “Connection failed: ” . $e->getMessage();
}
?>

Step 3: Create a New User

To insert a new user into the database, create a PHP script named

<?php
require ‘db.php’;

$name = “John Doe”;
$email = “john@example.com”;
$age = 30;

$sql = “INSERT INTO users (name, email, age) VALUES (:name, :email, :age)”;
$stmt = $pdo->prepare($sql);
$stmt->execute([‘name’ => $name, ’email’ => $email, ‘age’ => $age]);

echo “New user created successfully”;
?>

Step 4: Read Users

To fetch and display all users, create

<?php
require ‘db.php’;

$sql = “SELECT id, name, email, age FROM users”;
$stmt = $pdo->query($sql);

while ($row = $stmt->fetch(PDO::FETCH_ASSOC)) {
echo $row[‘name’] . “, ” . $row[’email’] . “, ” . $row[‘age’] . “<br>”;
}
?>

Step 5: Update a User

To update a user’s details, use

<?php
require ‘db.php’;

$id = 1; // Example user ID
$newEmail = “jane@example.com”;

$sql = “UPDATE users SET email = :email WHERE id = :id”;
$stmt = $pdo->prepare($sql);
$stmt->execute([’email’ => $newEmail, ‘id’ => $id]);

echo “User updated successfully”;
?>

Step 6: Delete a User

For deleting a user, create

<?php
require ‘db.php’;

$id = 1; // Example user ID to delete

$sql = “DELETE FROM users WHERE id = :id”;
$stmt = $pdo->prepare($sql);
$stmt->execute([‘id’ => $id]);

echo “User deleted successfully”;
?>

Git : The Timeline

History and Logs

To understand the fabric of your project’s history, git log is your looking glass. This powerful command reveals the chronological order of commits, helping you trace the evolution of your project.

Viewing Changes

git log --pretty=format:"%h - %an, %ar : %s"

This spell lets you see each commit’s hash, author, time, and message in a concise format, providing a quick overview of project changes.

Collaborative Enchantments

Branches known as the master or main branch.

The Branching Strategy

A common strategy in collaborative projects is the feature branch workflow:

  1. Creating a New Branch: For each new feature or bug fix.
    git checkout -b feature/your-feature-name
  2. Merging: Once the work is complete and tested, merge it back into the main branch.
    git checkout main
    git merge feature/your-feature-name

Merging, Pushing, and Pulling

Pushing

Once your feature is polished and ready, push it to the remote repository :

git push origin feature/your-feature-name

Merging

Before merging, ensure your branch is up to date with the main branch to avoid conflicts :

git fetch origin
git rebase origin/main

Pulling Changes

Keep your local repository updated with changes from your team :

git pull origin main

Initiation vs. Cloning

  • git init: Conjures a new Git repository from thin air, ideal for starting fresh spells.
  • git clone: Duplicates an existing repository, including all its history and branches, perfect for joining ongoing projects.

Git Good Practices

Here are some practices to ensure your messages stand the test of time :

  • Be Concise and Descriptive: Your first line should be a summary of the commit, followed by a detailed description if necessary.
  • Use the Imperative Mood: Write commands, not descriptions. For example, "Fix bug" or "Add feature", as if you’re instructing the code to change.
  • Commit Logical Units: Each commit should represent a single logical change. This practice makes it easier to understand and revert changes if needed.

GitKraken

For those who prefer a more visual approach, GitKraken is a potent GUI that simplifies complex Git commands into drag-and-drop actions. It’s particularly useful for visualizing branch structures and merging.

Conclusion

Mastering these advanced Git practices will not only make your work more effective but also foster a harmonious environment for collaboration within your team.

return Become

Algorithm FullStackJourney

Input: A bright-eyed developer with dreams of coding mastery
Output: A wise, slightly caffeinated full-stack developer

Begin
  frontEndSkills = Learn(["HTML", "CSS", "JavaScript"])
  Celebrate("I've mastered the front end!", withConfetti=true)

  while true do
    Try
      backEndSkills = Learn(["Node.js", "Express", "Databases"])
      Celebrate("I've conquered the back end!", withMoreConfetti=true)
      Break
    Catch NewFrameworkOrLanguageException as e
      Sigh("Looks like there's more to learn: " + e.name)
    EndTry
  done

  DeployFirstProject()
  EncounterBugThatDefiesAllLogic()
  StackOverflowSearchCounter = 0

  while not FixedBug do
    StackOverflowSearchCounter += 1
    TryFixBasedOnForumAdvice(StackOverflowSearchCounter)
  done

  if StackOverflowSearchCounter > 50 then
    QuestionLifeChoices()
  else
    Celebrate("It's alive!", withEvenMoreConfetti=true)
  endif

  return Become("A wise, slightly caffeinated full-stack developer")
End

This "algorithm" starts with the initial excitement of learning front-end technologies, followed by the dawning realization of the complexity of back-end systems. Along the way, our developer faces the inevitable rite of passage: a bug that makes absolutely no sense, leading to countless searches on StackOverflow. In the end, wisdom and a slight caffeine addiction are gained, marking the true signs of a seasoned full-stack developer.

May this pseudo-algorithm inspire you to navigate the highs and lows of development with a smile (and maybe a coffee in hand).

Python-Django backend for data processing and an Angular front-end for the user interface

Code Algorithm with Comments

process.

# Django backend part

# models.py
from django.db import models

# Define the Article model to store the article data
class Article(models.Model):
    title = models.CharField(max_length=255)
    introduction = models.TextField()
    early_days = models.TextField()
    rise_of_frameworks = models.TextField()
    modern_era = models.TextField()
    emerging_technologies = models.TextField()
    conclusion = models.TextField()

    def __str__(self):
        return self.title  # Representation of the model instance

# views.py
from django.views.generic import CreateView
from .models import Article
from .forms import ArticleForm  # Import the form for Article

# View to handle the creation of an Article
class ArticleCreateView(CreateView):
    model = Article
    form_class = ArticleForm
    template_name = 'article_create.html'
    success_url = '/articles/'

    # Example method to handle form submission
    def form_valid(self, form):
        # Logic to process input data and generate article content
        # This is where you can integrate the article generation logic
        return super().form_valid(form)

# Angular frontend part

# article.service.ts
import { Injectable } from '@angular/core';
import { HttpClient } from '@angular/common/http';
import { Observable } from 'rxjs';

@Injectable({
  providedIn: 'root'
})
export class ArticleService {
  constructor(private http: HttpClient) {}

  // Method to submit user data to the backend and get the article
  submitData(userData: any): Observable<any> {
    return this.http.post('/api/articles/', userData);
  }
}

# article.component.ts (simplified for clarity)
import { Component } from '@angular/core';
import { FormGroup, FormControl } from '@angular/forms';
import { ArticleService } from './article.service';

@Component({
  selector: 'app-article-form',
  templateUrl: './article-form.component.html'
})
export class ArticleFormComponent {
  articleForm = new FormGroup({
    userData: new FormControl('')
  });

  constructor(private articleService: ArticleService) {}

  onSubmit() {
    // Call the service to submit the form data
    this.articleService.submitData(this.articleForm.value).subscribe(response => {
      // Handle the response here, such as displaying the generated article
    });
  }
}

Signature

For more insights and updates on web development, feel free to check my projects and thoughts at github.com/kvnbbg.

Mastering Figma: Advanced Techniques for Design Excellence

// Sample script to create a simple rectangle in Figma using the Plugin API
const figma = require('figma-api');

const createRectangle = () => {
  const rect = figma.createRectangle();
  rect.x = 100;
  rect.y = 100;
  rect.width = 200;
  rect.height = 100;
  rect.fills = [{type: 'SOLID', color: {r: 0.96, g: 0.67, b: 0.69}}];
  figma.currentPage.appendChild(rect);
};

createRectangle();

Links and Resources

Advanced Scripting Example


// Advanced script to analyze text layers in a Figma document for font size consistency
const figma = require('figma-api');

const analyzeTextLayers = async () => {
  const textLayers = figma.currentPage.findAll(node => node.type === 'TEXT');
  let report = {};

  textLayers.forEach(layer => {
    const fontSize = layer.fontSize;
    if (!report[fontSize]) {
      report[fontSize] = 1;
    } else {
      report[fontSize]++;
    }
  });

  console.log('Font Size Consistency Report:', report);
};

analyzeTextLayers();

Prepare yourself for a journey through the land of `isset()` and mysterious array behavior, all in good fun.

Let’s draft an algorithm that humorously mirrors the life of a PHP developer, diving into the abyss of arrays, objects, and the occasional unexpected string where a boolean was due.

<?php

// Algorithm: ThePHPDeveloperSaga
// Input: A hopeful developer ready to dive into PHP
// Output: A PHP developer enlightened by the quirks and features of PHP

function learnPHP($developer) {
    echo "Starting the PHP journey...brace yourself for unexpected twists!\n";
    $skills = ['basic syntax', 'working with forms', 'managing sessions', 'database interactions'];
    foreach ($skills as $skill) {
        echo "Learning $skill...\n";
        // Simulate learning time
        sleep(1);
    }
    echo "Congratulations! You've got the basics down.\n";
}

function faceTheFirstBug($developer) {
    echo "Encountering your first bug: unexpected T_PAAMAYIM_NEKUDOTAYIM\n";
    // Simulate debugging time
    sleep(2);
    echo "Resolved! It means 'unexpected ::', just a fancy way to confuse beginners.\n";
}

function diveIntoFrameworks($developer) {
    $frameworks = ['Laravel', 'Symfony', 'CodeIgniter'];
    echo "Time to pick a framework and master it...\n";
    $chosenFramework = $frameworks[array_rand($frameworks)];
    echo "Diving into $chosenFramework...\n";
    // Simulate learning framework
    sleep(2);
    echo "$chosenFramework mastered. Now you're a PHP artisan, not just a developer.\n";
}

function endlessCycleOfUpdates($developer) {
    echo "PHP updates...always a fun surprise.\n";
    // Simulate keeping up with PHP updates
    sleep(1);
    echo "Congratulations, you're now fluent in the latest PHP version. Until tomorrow.\n";
}

// The grand saga begins
$developer = "A brave soul";
learnPHP($developer);
faceTheFirstBug($developer);
diveIntoFrameworks($developer);
endlessCycleOfUpdates($developer);

echo "The saga continues...with more bugs to squash, frameworks to learn, and updates to install.\n";

?>

This pseudo-PHP script takes our intrepid developer on a whirlwind tour through the essentials of PHP development, from mastering basic syntax to squashing esoteric bugs (like the infamous T_PAAMAYIM_NEKUDOTAYIM) and becoming proficient with popular frameworks. The journey through PHP is punctuated by the ever-present cycle of updates, keeping our developer on their toes. Remember, in PHP, the only constant is change (and the occasional array behaving oddly). Happy coding!

« Older posts

© 2024 Kvnbbg.fr

Theme by Anders NorénUp ↑

Verified by MonsterInsights